
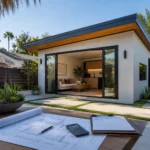
A great outdoor kitchen isn’t just a “nice-looking grill station.” It’s a functional extension of your home that should handle California sun, temperature swings, and real-day use—from weeknight dinners to weekend gatherings. The best designs come down to three things: smart layout, weather-ready materials, and proper utility planning (gas, electrical, and plumbing when needed).
This guide covers proven outdoor kitchen layouts, planning tips, material choices, must-have features, and practical notes for homeowners in Inland Empire areas like Rancho Cucamonga, Ontario, Upland, Fontana, and Claremont.
1) Start With How You’ll Actually Use It
Before you pick finishes or appliances, answer:
-
Is it mostly grilling, or full cooking + prep?
-
How many people will be around it during gatherings?
-
Do you need a sink, fridge, or just cooler storage?
-
Will you use it year-round or mainly spring/summer?
Pro tip: A slightly smaller kitchen with better flow and prep space often feels “bigger” and works better than an oversized build packed with unused appliances.
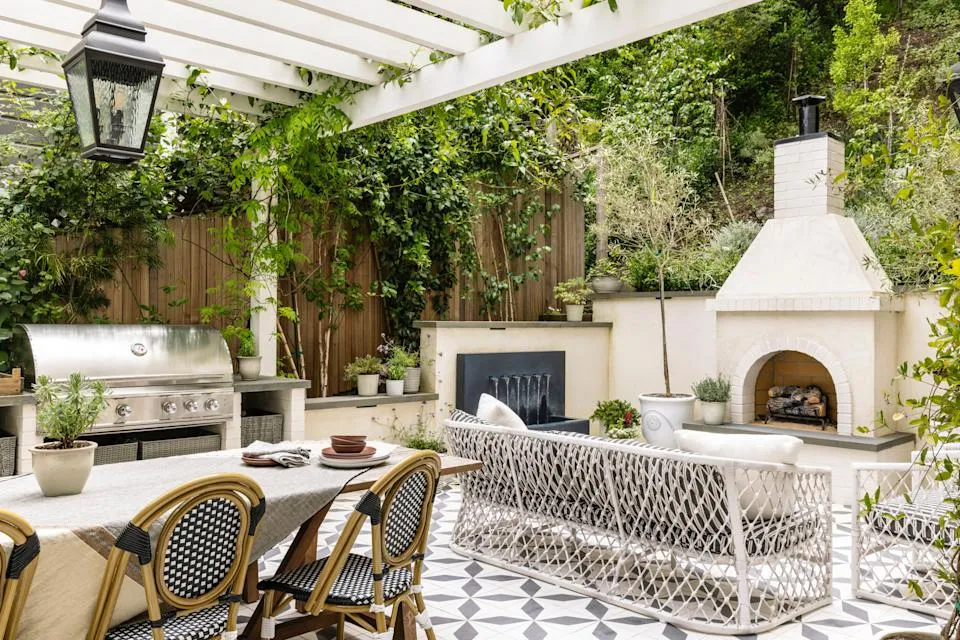
2) The 5 Best Outdoor Kitchen Layouts (Choose Based on Space)
1) Straight-Line Layout
Best for narrow patios or against a wall/fence.
Ideal for: grill + prep counter + storage.
2) L-Shape Layout
Most popular option because it separates heat and prep zones naturally.
Ideal for: grill zone on one side, prep/serving on the other.
3) U-Shape Layout
Built for serious outdoor cooking with maximum counter space.
Ideal for: families who host often and want a “true kitchen feel.”
4) Island Layout
Great for entertainment—guests sit/stand around the island while you cook.
Ideal for: open backyards with plenty of circulation space.
5) Galley Layout (Two Parallel Runs)
Efficient workflow if your space supports it.
Ideal for: separating cooking and prep/serving runs.
3) Build It Around “Zones” (The Secret to Easy Cooking)
Design your outdoor kitchen in zones:
-
Hot Zone: grill / burners / pizza oven
-
Prep Zone: large, clear prep surface
-
Cold Zone: undercounter fridge / beverage cooler
-
Clean-Up Zone: sink + trash/recycling (if included)
-
Serving/Seating Zone: bar top, pass-through counter, or table
Safety note: Keep a comfortable clearance in front of the grill and avoid placing the grill too close to seating or high-traffic paths.
4) Placement: Wind, Sun, and Smoke Matter
Where you place the kitchen affects comfort more than the countertop color:
-
Keep the grill where smoke won’t blow into seating areas or into open doors/windows.
-
Consider afternoon sun direction—Inland Empire backyards can get intense heat.
-
Leave room for doors to open (fridge, drawers) without blocking walkways.
Pro tip: Adding shade (pergola or cover) over prep/serving areas dramatically increases how often you’ll use the space.
5) Material Choices That Perform in California Weather
Countertops (Outdoor-Ready Options)
-
Porcelain/Ultra-Compact Surfaces: excellent heat and stain resistance
-
Granite: strong and durable, but needs periodic sealing
-
Concrete: modern look, but needs proper sealing and crack-control planning
Cabinetry / Storage
-
Stainless steel (quality grade + proper installation)
-
Outdoor polymer/HDPE cabinetry for weather resistance
-
Avoid interior-grade cabinets—heat/sun/moisture can warp and fail quickly.
Flooring and Safety
Use surfaces that resist slipping, especially near sinks or beverage areas:
-
textured tile, pavers, or finished concrete with traction
6) Appliances: What’s Worth It (and What’s Usually Not)
Start with essentials:
-
Built-in or standalone grill
-
Side burner (sauces, boiling, quick frying)
-
Undercounter fridge or beverage cooler (huge convenience upgrade)
Optional based on lifestyle:
-
pizza oven, smoker, ice maker, warming drawer
Pro tip: Prioritize a larger prep counter before adding a third “fun” appliance.
7) Utilities and Permit Basics (Plan This Early)
Outdoor kitchens often involve:
-
Electrical: lighting, outlets, fridge, ignition, fans
-
Gas: grill, burner, pizza oven (depending on setup)
-
Plumbing/Drainage: if adding a sink
Even small choices (like adding a sink later) can impact routing, costs, and required approvals. Plan utilities at the start so you’re not forced into awkward layouts or last-minute compromises.
8) Lighting and Comfort Upgrades That Make It Feel Premium
-
Task lighting over prep and grill surfaces
-
Ambient lighting for seating
-
Path lights for safe movement at night
-
Fans/heaters depending on season and patio design
-
Built-in trash/recycling drawer for a cleaner experience
9) Budget Tiers: 3 Common Build Levels
Costs vary by size, materials, and utilities, but most outdoor kitchens fit one of these tiers:
Level 1: Essentials
Grill + prep counter + basic storage
Level 2: Entertainer Setup
L-shape + fridge + upgraded finishes + better lighting
Level 3: Full Outdoor Kitchen
U-shape or island + sink + multiple appliances + cover/pergola + premium materials
10) Typical Project Timeline (Realistic Steps)
-
Planning + measurements
-
Design + selecting materials/appliances
-
Utility routing and prep
-
Build: structure, counters, storage
-
Appliance installation + testing
-
Final finishing + cleanup
Pro tip: Ordering materials/appliances early is one of the best ways to prevent delays.
11) Common Mistakes to Avoid
-
Too little prep space
-
Grill placed where smoke hits seating
-
Non-outdoor-rated cabinetry
-
Underestimating utility needs
-
Skipping shade and lighting (reduces actual usage)
-
Poor circulation: guests block cooking area
FAQ
“Do outdoor kitchens in California require permits?”
“It depends on what’s included. Adding gas lines, electrical upgrades, plumbing, or permanent structures may require approvals. It’s best to plan utilities early and confirm requirements based on your specific scope.”
“What’s the best outdoor kitchen layout for most backyards?”
“An L-shape layout is often the best balance of space, workflow, and cost. It separates cooking and prep areas naturally and fits many patio shapes.”
“Is a sink necessary in an outdoor kitchen?”
“If you cook outside frequently, a sink is one of the most useful upgrades. For occasional grilling, you may prefer more prep space instead.”
“Which countertop material handles heat best?”
“Porcelain and other ultra-compact surfaces typically perform very well against heat and staining. Granite is also durable but usually benefits from periodic sealing.”
“How do I reduce smoke issues near seating?”
“Choose placement based on wind direction, keep the grill away from the main seating path, and avoid positioning it directly under low covers without proper ventilation planning.”
“What appliances give the best value?”
“A quality grill, a side burner, and an undercounter fridge provide the biggest everyday convenience. Additional appliances should match how often you’ll truly use them.”
“How can I keep the project timeline shorter?”
“Finalize decisions early and order appliances/materials ahead of time. Many delays come from late changes, backorders, and redesign requests mid-build.”
“What’s the 1 design upgrade that makes it feel high-end?”
“Better lighting and a well-planned prep/serving zone. Those two changes improve both functionality and the ‘wow’ factor immediately.”
If you’re planning an outdoor kitchen in Rancho Cucamonga, Ontario, Upland, Fontana, or nearby Inland Empire areas, we can help you design a layout that fits your space, your cooking style, and your budget—while planning utilities properly from the start.